Showing posts with label Cakes. Show all posts

Thursday, 7 February 2013

Carrot & Walnut Cake

Nearly a year later and I still can't cut a bloody cake in half!

Hi there stranger!

Long time no speak! (or type I suppose..)

I haven't actually blogged for nearly a year, completely insane- but I've been in a whirlwind transformation from dirt poor student to a full-time Junior Baker. The hours have been long and brutal and we work long into the night baking artisan breads but it's all amazing experience and has been pretty damn fun.

So yes, I've been pretty run-down with the night shifts, the long hours started to take it out on my back and basically entire body so i felt a bit like an ill-oiled tin man, (still a happy tin man though!) but believe it or not, i've only just got used to it (after 8 months!) so i thought some blogging was in order, now that i can move my arms :D

It's been a while since i've done all this malarkey so you'll have to bear with me whilst i warm up again.

I thought i'd start off with something that was familiar yet unfamiliar ground. 

A cake. A cake I can do. Yes. 

BUT! I've never baked this kinda cake, since I've only just been introduced to the deliciousness that is a traditional carrot cake! I thought I'd add walnuts to this recipe just to add some crunch and texture. I WAS going to put in orange zest into the cream cheese frosting as well for some tang, but the zest I grated kinda turned into juice so that didn't happen. But by all means, if your oranges play ball then zest it up!

The recipe I've created is adapted from The Hummingbird Bakery "Carrot & Ginger Cake". 
(I can now all hear you saying "What?! That sounds way better! Screw this! Get me that Hummingbird book!") Cheers guys.

Oh! and the cream cheese frosting is a recipe from Tea with Bea, it's one that I will forever use, as it's so much lighter than normal american, not too sweet and just the right amount of fluffiness ^_^ I used it before on my last red velvet cake I made (A revision of this cake is yet to come! Well, at least hopefully an improvement).

I'll tell you now, that the cake was pretty amazing. It's even one of those that gets better with age, tastes better the day after you've made it! So if you ever make this for a party, for dinner, or just because you fancy a whole 8 inch cake to yourself, I'd say make the cake the day before, and frost the day you cut it. The cake is incredibly moist and just the right amount of denseness you want from a carrot cake. Sweet and slightly spiced with a smooth and airy cream cheese frosting just to send it on it's way. 

PRITTY DELISH.

Carrot & Walnut Cake

You'll need: 
20cm / 8 inch round deep-fill cake tin (I use one tin for cakes now because I like the even flat layering you get when you cut it)

OR if you find it easier:
2 x 20cm / 8 inch round regular cake tins (you'll just need to half the baking time and switch the tins round halfway through)

- 350g carrot (grated)
- 40ml buttermilk 
- 3 large eggs
- 1 tsp vanilla extract
- 125ml vegetable oil
- 210g caster sugar
- 260g plain flour
- 1 tsp baking powder
- 1 tsp bicarbonate of soda
- 1/2 tsp salt
- 1 tsp cinnamon
- 100g walnuts (chopped) (save some for decoration)

Frosting (from Tea with Bea):
- 250ml whipping cream (very cold)
- 175g mascarpone
- 175g cream cheese
- 2 tsp vanilla extract
- zest of 1 orange (optional)

Here we go!

1) Preheat oven to 170C (325F) and line your cake tin(s) with baking paper.

2) Using an electric mixer or electric hand whisk, mix together the carrots, buttermilk, eggs and vanilla extract, vegetable oil and sugar until well combined.

3) Sift together flour, baking powder, bicarbonate of soda, salt and cinnamon. Slowly beat this into the carrot mixture in 3 additions, making sure to scrape down the sides of the bowl after adding. Stir in most of the chopped walnuts until the batter looks pretty smooth and even.

4) Pour cake batter in tin(s) and bake for about 1 hour 10 mins or until the cake bounces back when lightly pressed. (after the first 30 mins, I covered the top of mine with baking paper to stop the top from catching and browning anymore, you won't need to do this if you are using 2 regular sandwich tins, just remember to bake them for half the time- about 30 mins) 

5) Allow cakes to cool completely on wire rack (or upside-down utensil holder in my case :P) Meanwhile, you can get started on the frosting.

6) Whisk the cold whipping cream until it's reached a stiff peak consistency. In a separate bowl, mix together the rest of the frosting ingredients until well combined.

7) In 3 parts, fold in the whipping cream into the cream cheese mix until evenly distributed. Chill for 15 mins (or for however long it takes for the cake to cool down)

8) WHEN THE CAKE IS COOL. Cut cake in half, (if you used a single cake tin). Sandwich cakes together with frosting and frost the outside (try and use all the frosting, the cake really benefits from it!) Sprinkle with a little cinnamon and the rest of the chopped walnuts.

9) Do celebration dance and pound cake into your face. (MUST REMEMBER!)

I HOPE YOU LIKED IT AS MUCH AS I DID (oops caps)... I totally just shouted at you through my computer...

Monday, 4 June 2012

Ju-bi-lu-beeee

Sorry for not being around.
It was a nightmare for this blog- not because my computer broke or a rabid monkeys stole my keyboard.
No it was worse.

My oven broke.

I know, I know, It was tragic. We were ovenless for a whole 3 weeks. But now we have a BOOOOOTTTIFFUULLL shiny new one :) shame, i've only got another month in this house, I wish i could run away to my new house with this new oven. But anyway.

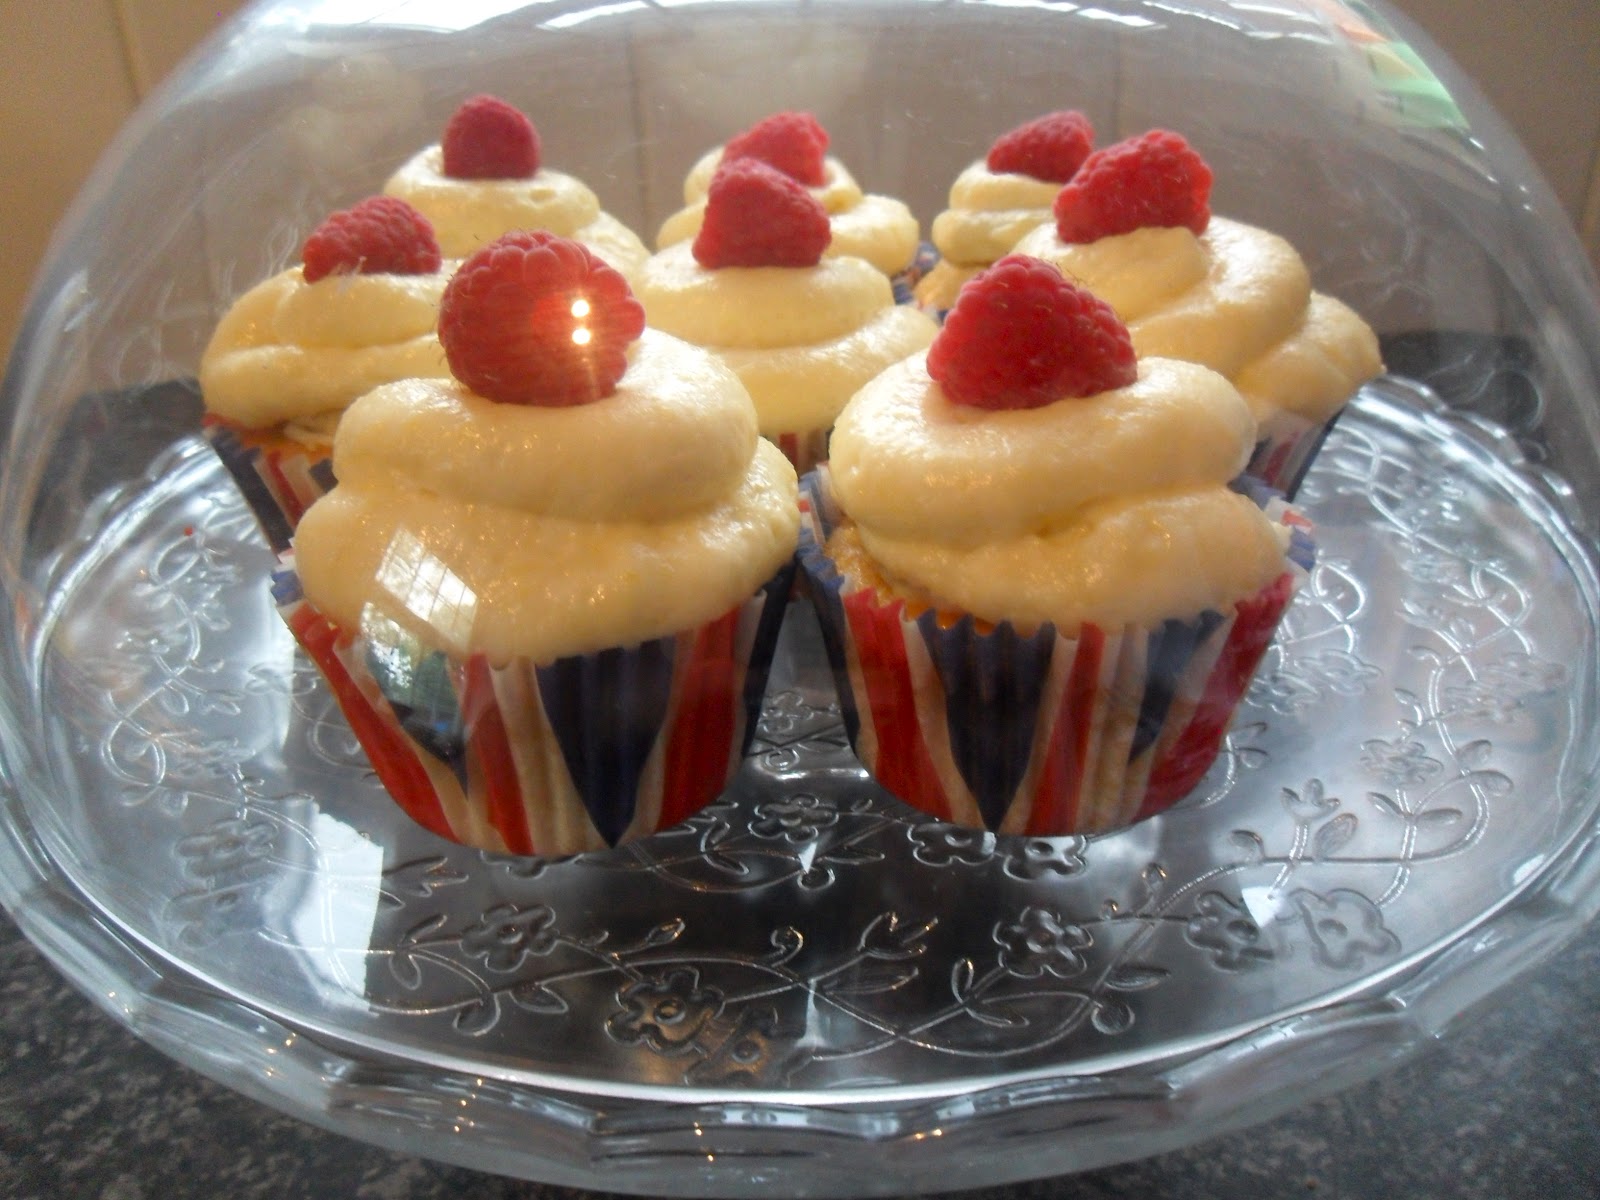
We recently had a garden party to prematurely celebrate the Queen's Jubilee as well as a kind of celebratory graduate party... So i thought it would be a perfect time to bake some patriotic cakes. However, as I was just putting the finishing touches to my project for uni as well as setting up an exhibition, I had minimal time to be creative and serve up an original recipe, so I baked recipes o ut of a book to save time- however, they were things that I haven't made before :) so it was still very exciting.

I decided to make:

Raspberry Trifle Cupcakes (Cake Days- Hummingbird Bakery Book)
and
Melting Moments (The Great British Bake Off Book- Mary Berry)

I will let you know now that I was so strapped for time and energy that I didn't actually get to buttercream and fill my melting moments, so they were a bit of a challenge to eat (imagine eating a jacob's cracker with no water) but nevertheless, they were definitely melty! But err, yeah next time I should really cream them up. Lazy me.

Oh and kudos to my lovely big sister buying me these union jack cupcake cases :)
They were probably the only things that had me itching to be patriotic (for once) teehee.

Here's some happy pictures documenting the experience:


filling the cupcakes- jam, then raspberry, then CUSTARDDDD, then cake, then MORE CUSTARRRD! (then another raspberry)

photos started to get a bit rubbish now as it started to rain. Typical.

Sad cupcake looks onwards at our wet bunting.


Friday, 16 March 2012

Chocolate Buttermilk Sponge with Cookies & Cream Buttercream (Cookie Apocalypse)


This week, my sister came to stay with me- and since we both love a good bake, we decided to make a cake together (nawwwww)...

We decided on making a rich Chocolate Buttermilk sponge (found from tea with Bea) and pair it with a rich American vanilla buttercream and smashed Maryland cookies into it (mmm, mmmm)

Now we weren't sure what to expect with this buttermilk sponge, since neither of us have really made one, or knew the different between this mix and an average one.

Let me tell you now, that whenever in the future, when i crave to make a chocolate cake, i will FOREVER choose this AMAZING buttermilk sponge recipe. The cake mix looked light, airy and almost mousse-like, and the CRUMB! oh the crumb was INCREDIBLY light and feathery, if you touched the cake it was just the softest!! I can't stop raving about it!

It came out as a beautifully soft and airy sponge, but the taste was rich and fudgey, the sponge melts in your mouth like a brownie... an amazing experience i tell thee!


There was quite a lot of mix for my 8" cake tin, so we managed to make a full batch of cupcakes too! Bonus!! We crumbled up a few and decorated the big cake with a crumb coating- very pretty... shame about the bright red Celebrations box lid i had to put it on -_-'

For the buttercream, it was just a normal american vanilla buttercream (with quite a bit more milk added in as it was supppperrrrrrrrr sweet) and crushed up a packet of cookies and added them in. 

My sister taught me how to put a crumb coating on the cake before properly covering it with the frosting as it was pretty thick and chunky to work with... Something to apply to future layer cake decorations..

Speaking of decorations, we got a bit crazy with another packet of cookies and chucked them all ontop because we wanted to... COOKIE DEVASTATION!!!

Like a beautiful natural cookie disaster.. Nom.

As i said, we had a batch of cupcakes to decorate too so here are some pictures of them


Saturday, 4 February 2012

Red Velvet Layer Cake


I heart red velvet cakes.

And if you read my blog often, you'd know that i've had several failed attempts. Usually due to the fact that i used an entirely different food colouring (green or orange) so they came out a rather attractive colour suitable for the loo. Mmm..

A very nice grandma of one my housemates (Lizzie), gave me the rest of her Sugarflair red food colouring paste- this was like my holy grail. My passageway into the age of successful red velvet baking.

I couldn't wait to bake this baby.

I used the Red Velvet Layer Cake recipe from Bea's of Bloomsbury's "Tea with Bea" book.

And once again, (i think im making a habit of this) i took many a photo.

This was everything that went into the cake mix. That's homemade buttermilk in the jug on the left there, to be combined with the red wine vinegar and baking powder as the raising agents. And the oil is used for fat instead of butter.

In action... oh you can kinda see me in the handle there- "OH Hi!"

This was when i cut my finger... Ahhhhhhh just kidding. Food colouring paste in :P

As red as my mixer

Slightly out of focus... cake batter in the tin before baking...

AFTER BAKING!! Giant, bouncy and red.

As I've never really made a layer cake before, the prospect of having to divide this rather shallow cake into 3 layers made me break out in a cold sweat... But i was determined to be brave and to be honest i couldn't talk to anyone while i did it... each slice turned out to be 1cm thick.

one slice down, one more to go...

I think i had to have a nap at this stage... So. Much. Stress.


So i was advised to make this particular cream cheese frosting in this recipe. AND MY GOD. Was it the best advice ever.

Normally, i find cream cheese frostings a little too heavy and actually a little sour.. (no my cheese wasn't off). But this alternative frosting had special additions of mascarpone and whipping cream so it was SUPER light and creamy- it was like eating ACTUAL AIR.

I had to stop myself nomming it all right there and then.

You basically just first whipped the cream to a soft peak consistency before blending the cheeses together with icing sugar and vanilla essence. And then you fold in the cream so that it still has a really light and airy texture. 

Beautiful.

I definitely think i'll be using this cream cheese frosting instead of the one i have been previously.

Sandwiching done

This is the first time i've managed to completely cover a cake in frosting comfortably. I also think it's my best looking one! That doesn't say much about my decorating skills!! haa..

Looking pretty plain..


I had some leftover frosting so i thought i'd get fancy with the piping nozzles.. These were just tests.. Still an amateur afterall T_T

Attempting to get creative..

Finished frosting..

A little wonky- but we'll just call it rustic :P


I'm very happy with how this cake turned out. Definitely a far cry from my poo coloured cakes from back in the day (okay so maybe a few months ago)

The cake was really moist and indulgent. The light cream cheese frosting really complimented the denseness of the cake. 

It was just all round a really enjoyable thing to bake- especially around this time of year! Red for valentines day.. Bleurghgh...

The only thing i would probably have changed would have been to fold the flour in, instead of just blending it in like the recipe said. I don't know if red velvet's are always just meant to be dense, but as i'm a lover of light spongey things, i think i might try and incorporate more air into the mixture so it might turn out taller- and then be easier to slice into layers later!

Close-up of the super red cake. Excuse the large air bubble. I suppose i managed to get SOME air in in the end, eh?

Pretty darn proud :)

Thursday, 26 January 2012

Blueberry Muffins


So, i woke up this morning, bright eyed and bushy tailed, nice and early. And the sun was shining?!!
A question mark. That's right.
Because it's England, crappy England where noone knows what sunshine looks like and all the girls happen to get glorious orange skin from the rain water.
So anyway, with this brightening up my mood SIGNIFICANTLY, i grabbed the nearest unfortunate housemate and trotted off the supermarket to buy some blueberries.
Because who doesn't like waking up the smell of freshly baked blueberry muffins for breakfast??

Noone.
That's who.


Everyone knows i'm not the tidiest baker. I get a bit over-excited and i make a mess with my hands shaking with spoonfuls of batter in anticipation whilst i watch through the oven door.
(which by the way, i don't know why i do, since our oven door is totally a mirror. and therefore useless to see how any of your food is cooking. But at least you can check out your hair and see how much of a twat you look like still holding 2 battered spoons and muffin mix on your face.)

everyone likes a diagonal cake photo don't they? well i do. you must all know that by now.

in fact, i like it so much, that i took two!


I love when i'm able to bake in the morning because it's sunny. It means i can take rather attractive photos and i don't need that garish horrible flash. 
Having said that, i don't in the slightest have any eye for photography.
So i apologise for my amateur "look how AHMAYZING my cakes are" photos.

Besides that, my muffins were lurrvly especially when warm. Had a nice crisp top and a gooey centre... this may have been because of a generous blueberry overload (see last picture). 


I also thought they were a little on the small side, maybe that's because i'm greedy.. so i thought with the second batch, i would fill them a little more... maybe just a smidge...


errrr... no. Well the others to be fair, don't look THAT bad... it's just those siamese ones reaching out to all the others... So this is what happens when i get greedy and over-excited. You get explosion cake.

OMG- it looks like something died in my cake!


This was after i took a bite out, it was sooo soft and gooey. I'm sorry about the flash making the cake look anaemic, i was nomming it down, i couldn't be bothered to get a plate and take a lovely picture, so i used the dreaded flash.

As you can see, it was a massive blueberry mess inside. I guess you can say i didn't skimp one bit on the blueberriness of my blueberry muffins... but still..

they should probably be called Blueberry Bombs. I mean, look at them.

What a deliciously gooey purple mess.


Thursday, 12 January 2012

Lemon Drizzle Loaf


After Christmas and the lovely event of a fresh new year with a shiny student loan, i decided to splurge my money on two things (well maybe 4...5.. maybe 8):


It took a lot for me to fork out for this kMix but i love it lots!... as a student i can't yet afford a KitchenAid but this beautiful thing will do in the mean time :), a long with the books i also invested in some other bits and pieces, new cake tins, a flan tin... yeah.

Anyway, to test out the books, i thought i'd make something slightly different to what i've done before, something that i've always wanted to make, and that is super damn tasty.

I decided to try out the Lemon Drizzle Loaf recipe from tea with Bea. Unfortunately, i hadn't yet received my kMix so it was still made with the trusty hand mixer.

With the new information and tips i've gathered from these new books, i now had different things to remember to do before i bake i.e. making sure the butter and eggs are room temp., mixing eggs and sugar as soon as they mix etc... So with this recipe, as long as i remembered to zest my lemons and juice them before hand, line my loaf tin, it was pretty simple to follow recipe, as an easy "bung all together and expect beautiful results."

The only thing that went wrong with this for me, was that the loaf tin wasn't quite big enough, so the cake took nearly twice as long to cook, it was a little caught on the outside too. However, the inside of the cake was SOOO MOIST, spongey and lemony. And the extremely sweet drizzle coating helped to lift the slight bitterness of any little burnt bits.

the colour isn't right at all on this picture, apologies. but the cake was really light! ^_^

But besides that, this loaf was perfect with a cup of tea and gone in 2 days! Next time, if someone arrives out of the blue for a cup of tea, i will definitely be whipping this baby out again!